Showing posts with label Math quilt. Show all posts

Sunday, August 7, 2011

Infinite

My son is about to leave to start his freshman year of college.


He is my oldest of 3 so the house will not be empty when he leaves ,,,,  but it will be emptier.

I made him a quilt.  Introducing Infinite, binding attached and all beautiful after a trip through the washer and dryer.  (No idea why this photo is turning sideways.)  The quilt is sized for a XL twin.


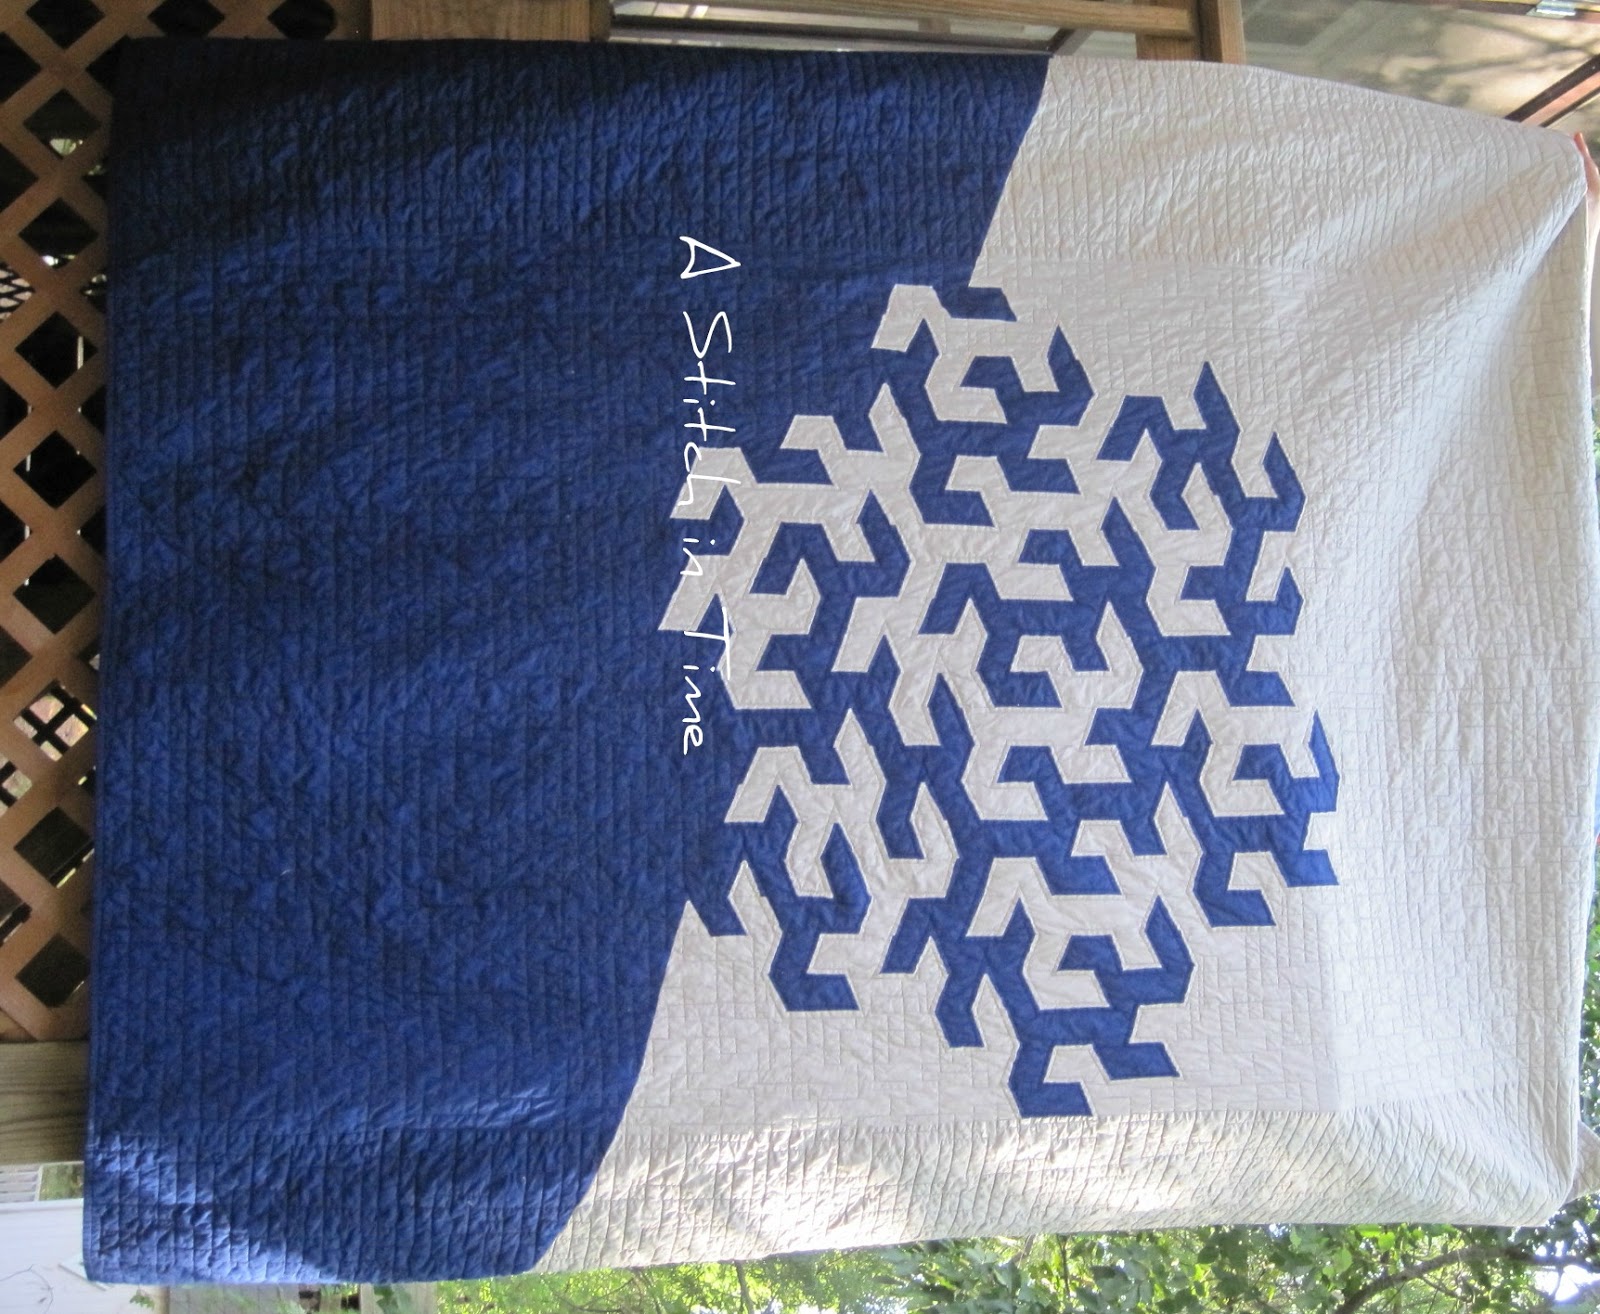
 Very pleased with the wonderful job by my LAQ.  She outlined the design beautifully.


 In the areas around the center, she did an overall intersecting rectangle design.


You can read more about this quite on this post.   It is a fractal, significant since my son will be studying math and computer science.  After much trial and error, I made templates.  The back is a soft flannel (he is my baby after all!).  All I need to do now is make a quilt label.

I had my Andy moment this weekend when I helped him start to organize his room to sort out what he was bringing and what he was leaving behind.  (Movie clip from Toy Story 3.)


Sigh.

Happy Stitching!

Sunday, July 10, 2011

Fractal Finished!!!

All done!!


Once I solved how to put it together, this was easy and fun to assemble. Templates were the key! I will drop this off at my long arm quilter next weekend.  Still thinking about the best way to quilt it - she will have plenty of ideas.  One thought is to stitch in the ditch around the pattern so that it will show on the backing fabric and then some kind of overall print for the rest.


Now it is time to move onto some smaller projects and plan for my next project.  We will spend a week at the beach later in July and I always manage some quality quilt time while there.  This was a small block I was playing with to see if it offered inspiration   


Happy Stitching!

Thursday, July 7, 2011

Almost done

Making more progress on my son's quilt.  If you look carefully, you can see a photo of the pattern I am going for sitting on top of the quilt.

At this point, most of the rows are sewn together.  I then have to decide on final dimensions and sew the large 'borders' of blue and gray to get the effect I want.

To keep the rows organized, I used a small piece of fabric with the row number written on it.  It became my 'leader' and then stayed attached to the row until it was ironed and pinned to the quilt.  This worked great!  In the past, I've used pins to represent this but using a small piece of fabric was much easier.


Happy Stitching!

Sunday, July 3, 2011

Back in the USA

Back home from China and happy to have a long weekend to recover.  I hope you enjoyed my photos from my tour of Shanghai.  They were all taken on Sunday - the only day I was not working.  I also spent a day in Beijing but other than a brief glimpse of the Olympic stadium from the cab, didn't have time to see anything.

I had no trouble accessing blogger from Shanghai but in Beijing, Google was 'not available'.  I would get a message to "try again."  I had my son check back home and blogger was alive and well.  It seems that the Chinese government makes Google look 'unstable' so it won't become popular.

Today, I went back to work on my son's quilt for school.- making great progress.

Here are my templates that I made for the blocks:

Here are all the rows assembled but not yet sewn together.  Each row is 2 1/2 inch strip.

Happy Stitching!

Thursday, June 9, 2011

Blue and Gray

My fabric for my son's new quilt arrived.  I ordered 7 yards of each 'color' to make sure I had both enough for the quilt and extra for the mistakes I am confident I will be making as I assemble this quilt.


I am still working on the most efficient way to make my HRT (half rectangle triangles.)  More on my quilt project is at this post.

Perhaps if I have any left over, I could outfit any remaining soldiers from the Civil War.


Happy Stitching!

Monday, May 30, 2011

The HRT ..... Half rectangle triangle

The best idea I've had so far regarding this new quilt for my son  (see this post to see a photo of inspiration piece) was to do a trial block. I learned a lot.


There were several reasons to make a practice block. The first was to validate the color combo was the right one - the initial thought here was Royal and Stone. After making the top half of a block in that color combo, I made the bottom half in Royal and Gray. I like this combination better.
The second reason was to help me appreciate how much fabric I will need. I do not own any design software - just graph paper, a pencil and a big eraser. With this block, I now know  I need roughly a 1/4 a yard of each color for each 12" block. The quilt has 10 blocks with lots of color changes in it.  Overall, I think I will need 6-7 yards of each color for this XL Twin quilt to fit a dorm room bed.
The final reason was to give me a sense of how difficult this would be to construct. I experimented a few times to figure how how best to make a HRT - half rectangle triangle that finished at 1 1/2 by 2 1/2.
My plan was to chain piece and trim out all these HRT ahead of time and then the assembly would be easy or at least easier.  As cute as these are, I had issues with the bottom row which required assembly of 11 pieces for a 12 inch row.  Something clearly went horribly wrong - either my seams were not all uniform width or I screwed up the cutting or both.  
If you've hung with me through this long post, thank you. I love using my blog to record my quilting progress even if only for me.


And just because I need to mix this up a bit, I've re-trimmed my Summer Breeze HST to the required 4" and had fun assembling more blocks.
Happy Stitching!


PS - if anyone has tips here to help me with this HRT challenge, send them my way.  Google suggests there may be a ruler or template that will help.